6mm Wargaming

Making 1/300th burning markers

Introduction

This is an update on an article I wrote a few years ago for making aircraft burning markers. I have revised the technique and now use clump foilage as the main ingredient instead of fibres. This technique can also be used for making vehicle burning markers and smoke markers and is able to be scaled up for larger markers or larger wargames scales.

For those interested, the original article is located here


The Ingredients

To make these markers I used the following items

  • Some pieces of thin wire (something that is easy to bend).

  • Woodland Scenics Autumn blend clump foilage

  • Various coloured paints - Red, Orange, White, Yellow, Black and Grey.

  • A hot glue gun, PVA (white) glue and scrap plastic.

br>


Click on the thumbnails to see the full sized image


Step One - Making the wire frame

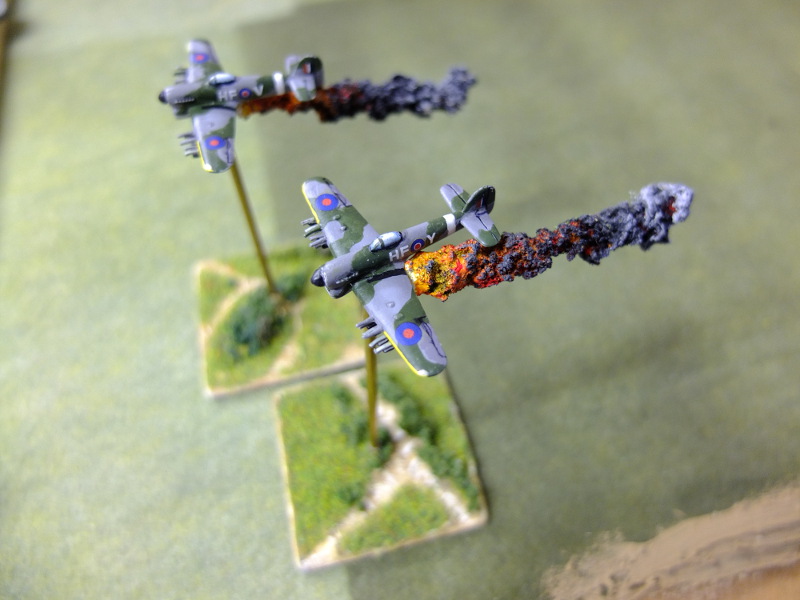
For a aircraft marker get a length of wire and wrap it around the 1/16" rod with one short and one long end. Use a pair of pliers to twist it until it is reasonably tight (you still want to be able to slide the wire easily up and and down the rod).

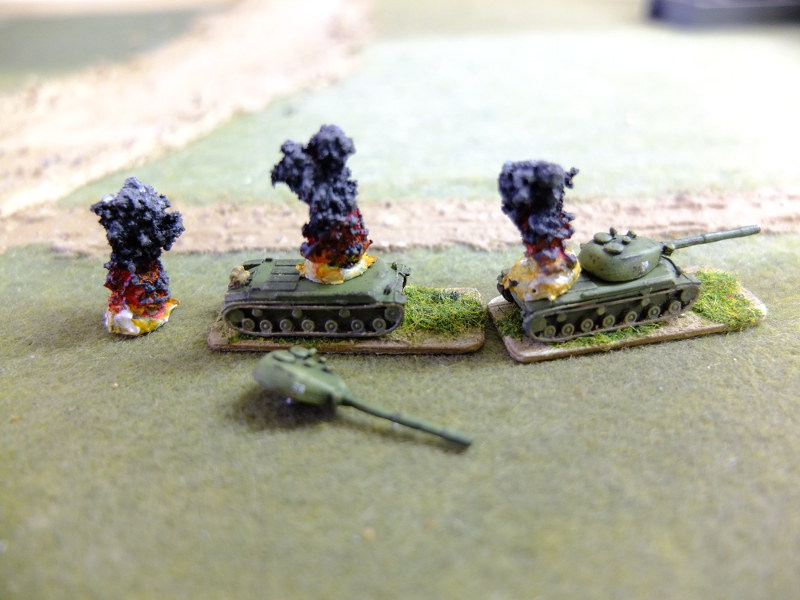
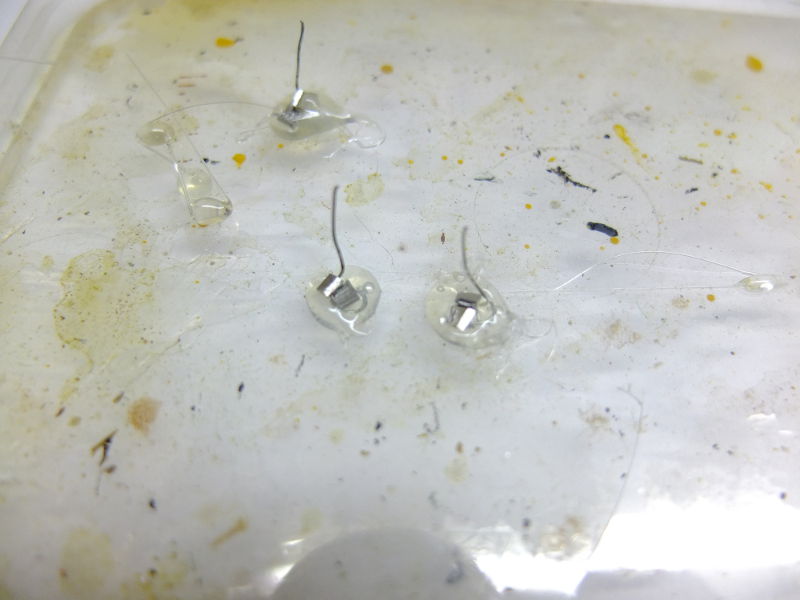
For a vehicle burning marker, create a cone shaped wire frame. Then get a hotglue gun and place a blob of hot glue onto scrap plastic (or something else where you can pop off the marker later) and press the wire frame into the hot glue. Add a bit more glue if required to create a reasonable sized base. I pressed a small piece of metal sprue from a figure into the glue straight after the wire and while the glue was hot, to give the base more weight (I'm not sure if this will make a difference or not but I thought I would try).


Step Two - Gluing the foliage on

Now start added the clump foilage to make the shape of the flames and smoke. Start with yellow clump then orange and finally red (as flames tend to be brighter in the center). I like to make the "flames" end narrower than the "smoke" end to create a cone shape.

Put a blob of PVA glue onto the wire and press a smallish yellow clump into the wire shaft and side it down the shaft. It should be around 1/4 the total length of the marker. Next add a bigger piece(s) of orange which is about 1/3rd the length/height of the marker and fatter than the yellow piece. Finally add the red clump foilage and make it as big as you want and you can extend it past the length off the wire. For these steps, use plenty of glue so that the pieces dont fall off easily.


Step Three - Shaping and base coat

Once the glue is dry, pinch off any pieces to shape the marker how you want but dont make it look too regular. You can also bend the marker to show the smoke drifting in a certain direction.

Now to paint the marker. I use a cheap can of black spray paint and begin by giving the marker a light black dusting all over. Be careful not to cover too much of the foilage especially the yellow part. Next I spray a heavier coat onto the orange and red parts but making sure that some of the red and orange shows through in the recesses (you are really trying to mostly cover the raised parts of the marker). Finally apply another coat of black over the red depending on how much smoke vs flame you would like your marker to have.


Step Four - Painting the marker

After the black paint has dried, the next step is to go back and brighten the flames on the marker. This is different to painting figures as you would normally start with a dark colour and end with a light colour. But for painting flames start with a almost white mix in the centre of the flame (see the previous step for a picture), and then move onto yellow then highlight with orange and a final red highlight. See the pictures for details on this step.


Last steps

The final step is to enhance the smoke part of the marker. I start with a medium grey paint and drybrush the black part of the marker. It is okay if a bit gets on the red paint to show smoke coming off the flames. I tend to drybrush a few coats on black area as the foam tends to absorb the paint. Next I follow this up with a light-grey drybrush but this is a much lighter drybrush than the other layer.

To make the markers more durable for the rigours of gaming I like to carry out one more step. I get a mix of about 30% PVA glue and 70% water in a container and then dip the marker into the mix and then drain the marker. Put the marker aside for a few days and wait for the glue to dry. This will make the markers rock hard and they shouldn't shed any flock. You can also use Woodland Scenics "Scenic Cement" but I'm not sure how strong this is. Some PVA glues are glossy so if you markers are glossy once the glue dries, give them a coat of matt varnish.


Vehicle markers and final comments

Here are the finished markers in use. I like the effect and they certain add a visual impact to games. I think they are much better than a cotton puff or some of the plastic markers available and the effort to make enough for a army isn't huge. Also is can be fun placing them on your opponents burning models so make sure you make enough for both sides!

A downside of the vehicle markers is that the are small and can be fiddly to balance on top of a 1/300th scale vehicle so they can be placed in front or behind a model.


Aircraft finished markers

The aircraft markers are great for single engine planes and I haven't come up with a way to model them for multi engine planes, but these still look great regardless of the plane model.