6mm Wargaming

Damage Markers for 1/300th Aircraft

Introduction

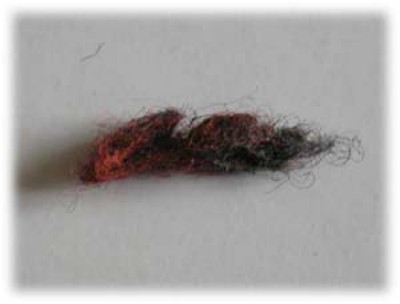
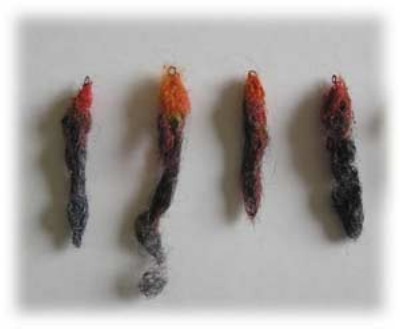
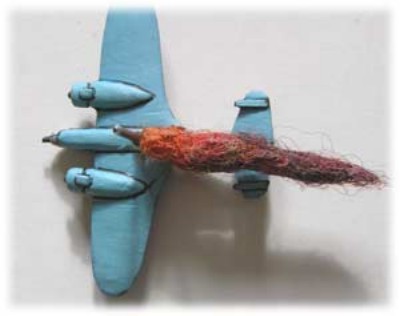
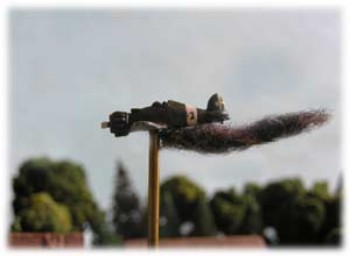
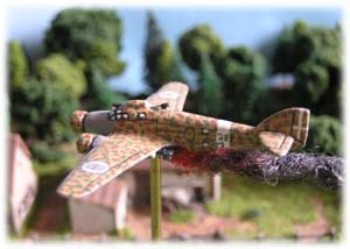
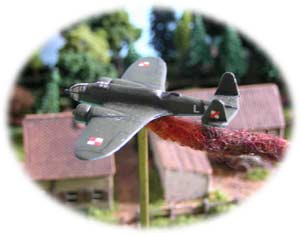
This page has been created to provide some simple step by step instructions on making burning markers for your aircraft. We use them to improve the visual aspect of our games, and mainly for the larger aircraft (like bombers), as fighters don't usually last long enough once they are hit!

The idea for these burning markers came from the set of rules "Canvas Eagles" by Eric Holtz. I adapted the idea so they would fit around the 1/16" pegs that a lot of gamers use for mounting their aircraft on stands. The Mustangs rules has a very good set of instructions for basing aircraft which I have ended up adopting (see the link on the sidebar for more info) for my models.

The Ingredients


To make these markers I used the following items

  • A piece of small and quite weak wire (something that is easy to bend).

  • Some different coloured fibres (commonly available from wargames suppliers or around Halloween time). To make the grey smoke I combined black fibre with cotton wool. Alternatively, you can dye or paint some cotton wool different colours, but I've never had much success with this.

  • Various coloured paints - Red, Orange Yellow, Black and Grey.

  • A piece of 1/16" brass or steel rod.


The steps

br>


Click on the thumbnails to see the full sized image


Step One

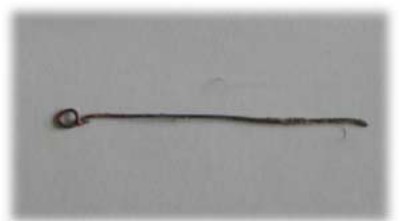
Get a length of wire and wrap it around the 1/16" rod with one short and one long end. Use a pair of pliers to twist it until it is reasonably tight (you still want to be able to slide the wire easily up and and down the rod).

Trim any excess wire from the short end. Next paint the stem red or orange to stop any metal showing through (but not too thickly otherwise it will not slide over the pin on your aircraft). Painting the stem is optional as its unlikely you will see it and the paint will probably chip off quite quickly.


Step 2

Next I mixed up the grey, black, red and orange fibres randomly and rolled them into a cigar shapes. Vary the mix depending on how big you want them to be, and how much smoke and flames you want.

I put PVA glue on the wire shaft and slid the fibre onto it. You can use a better quality glue but thats all I had with me at the time.


Step 3

Once the glue is dry, use a pair of scissors to trim off any fibres that are sticking out.

At this point I dipped the whole marker in watered down PVA and squeezed the excess out. This makes it more durable and helps to keep the fibres together. The PVA will dry clear so you wont notice it.


Step Four - Finishing touches

After the marker had dried, I re-trimmed and excess fibres and painted any areas that needed touching up.

Just slide you marker over the peg on your aircraft and mount it on your stand, and they are ready for the rigours of battle!


Some more examples of burning markers in action

As you can see these work best with single engined aircraft or small bombers. The mounting point of the marker is slightly wrong on large multi engined bombers and some modern jet aircraft but the effect is still good.