Painting and basing guide for 1/300th scale vehicles
Introduction
This is a quick guide I have put together on how to paint 1/300th scale vehicles. At the moment
it is only for vehicles that have a single base colour. I hope to write a similar article soon for
vehicles with camo paint schemes. Meanwhile I would highly recommend the Ritterkrieg site for some
good info on painting micorarmour. Also check the links on the right of this page for other sites
including Bob McKenzies excellent site.
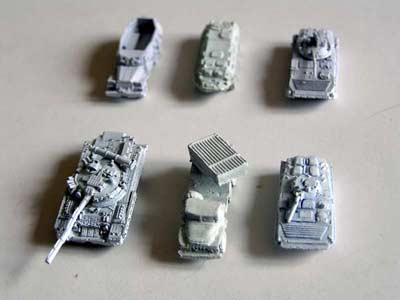
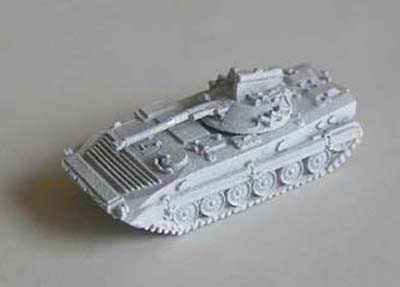
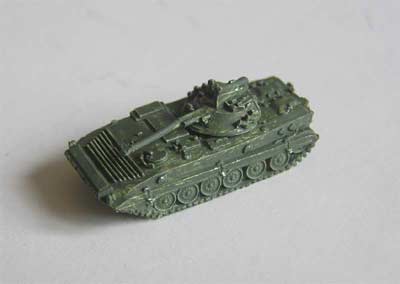
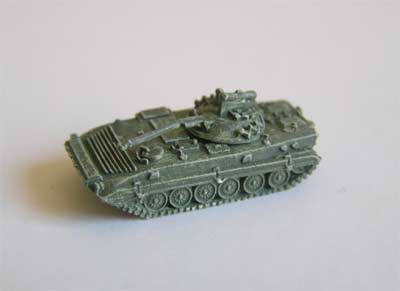
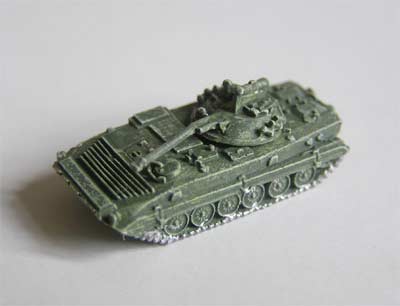
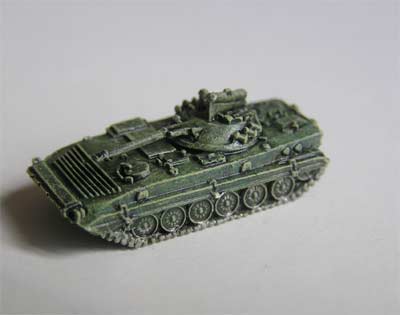
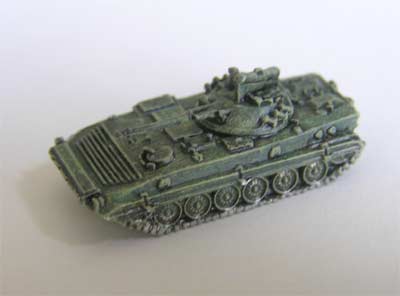
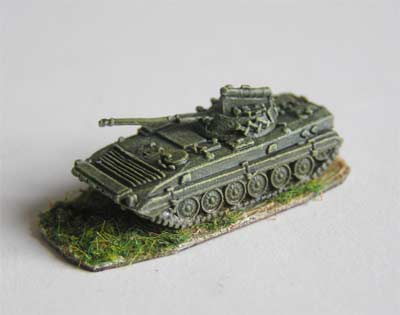
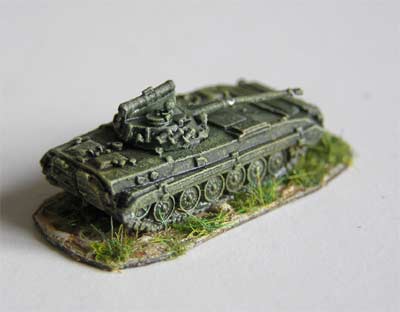
For this I used a mix of GHQ and Scotia vehicles to help show that you can use it on the "less" detailed
manufacturers like Scotia and Navwar. The articles shows a GHQ BMP2 but at the bottom of the page you'll see pictures
of these other vehicles completed.
Disclaimer
These photos are taken very close up and show every little flaw! After I reviwed the photographs, I was suprised how bad they looked in the pictures.
Starting out
Take a few models and undercoat them with a Tamiya white undercoat. I used to black but
I found that it darkened the base colours too much. It is a good idea to paint a whole
company of tanks/ APCs in batches so the colours will be consistent.
I tend to not use too much undercoat as the details can be easily obscured with thick layers of paint and the washes wont work as well.
Painting the base colour
Next paint the vehicles in the base colour and make sure it is covered well and that the paint is not too thick. For this example I have used Vallejo Soviet Green which I lightened with white, yellow and a light khaki colour. In this scale it is worth lightening the colour slightly it because of the small size of the models and I find that khaki excellent for lightening green as it doesnt change the colour very much but makes gives a lighter shade (if that makes sense!)
Drybrush the vehicle
I start with a heavier drybrush that is quite close to the base colour and follow up with 2-3 progressively
lighter layers of drybrushing. With each layer, the colour should get lighter until the last layer is
almost white (or similar) and you should have almost no paint on the brush. Each layer should also be a lighter
drybrush so that the last layer only get highlights some of the raised surfaces.
I found that the wash works much better if you have drybrushed the vehicle first (not sure why!)
Paint the details
Next paint the base colour of any details like the tracks, tires, seats, towing ropes and machine guns etc. Again the wash will help with the shading and will also help to hide some of the minor mistakes. For tires I use a grey colour with some blue added, as it creates a very good shade. Seats and ditching logs (on Soviet tanks) are painted using reddish-brown colour, which is a nice bright colour, and helps stand out against the dull green colour.

Apply the washes
Now mix up some water and Johnson's Kleer Floor Polish (about 70% water and 30% floor polish) and then add a few drops of GW black ink. I used to use cheaper indian ink but I found it stained too much of the surrounding area so I switched to GW inks. The ink colour you use will depend on the base colour. eg for sand coloured vehicles you may want to use a brown ink or a mix of brown and black ink to give a dirty colour.
There are two ways of inking but I have had more success with the second method. The first method is to use a big brush and apply the wash liberally. It doesn't matter if it looks like there is a bit too much on the model. You may find that gravity will cause a lot of it to run into the wheels or tracks
so you may want to use a tissue or similar to remove some of it.
The second method is to use a fine brush and "paint" the inks into and around the details. This is more time
consuming but I find it doesn't stain the base colour as much. I normally apply 2-3 coats per vehicle this way.
Note: you will have to experiment with how much ink to use for the wash but it is better to go a
little too light because you can always apply another coat or two of the wash to the vehicles, once
the others have dried. If the coat is too dark then you will probably have to strip them and start again or
you can try drybrushing it again.
Touch up the base colours again
Use a reasonably fine brush to fix up any areas that have been badly stained by the ink, or that need touching up.
You dont want to paint into the cracks where the ink is, but near it. I usually lightly draw the brush over the model
to only put some paint on the raised surfaces.
I usually give the model another light drybrush at this point if it looks like it needs it.
Finishing touches
You can use this stage to touch up any mistakes or add extra details like markings. I also like to
wash the lower part of the vehicle with a brown wash to make the tracks and wheels look dirty.
I have recently discovered the Tamiya weather powders and sometimes I will brush the lower part of the model to make it look dusty. However
I have found that you almost cant see it once the vehicle is varnished.
To add aerials, I get a cheap black paint brush and cut some bristles off it. I use a needle or pin
and tap it gently in to model where I want to aerial to go. Next I use a drop of super glue to glue
the aerial in. You could also add the aerials just prior to the wash and sometimes I do (when I
remember).
The vehicles will be quite glossy from the wash so you may want to give them a coat of matt varnish. The wash
gives them a good protective coating but I still give my vehicles 2-3 coats of varnish to be sure.
Basing
The bases I use are cut from thin galvanised steel that I get for the hardware store and are called "Soakers". I
use metal so that the vehicles can be stored in a box with some magnetic material lining them. I also find that the
steel bases do not slide down hills unlike vehicles mounted on magnetic material.
From the pictures you can see the bases. The first base in the picture shows the shape I cut. I always
may the edges rounded (so the are not sharp) and I extend the out the front of the vehicle for tanks, to
help protect the barrel. The second base shows the base with "Selleys No More Gaps" applied. The third
base in the picture shows it painted and drybrushed and the last shows it with flock on the base.
At this point the models have been given a few coats of matt varnish which helps take the shine off the washes,
and tends to brighter the colours slightly.
More pictures
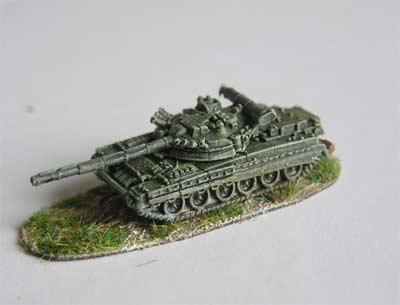
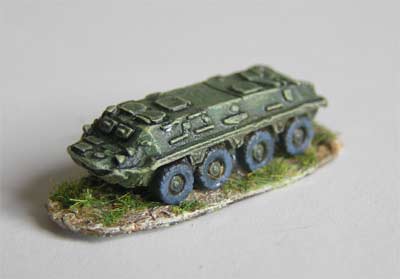
Here's another picture of the BMP2 from a different angle along with a T80U and a BTR60PA
The pictures aren't very flattering when blown up this large, as every little flaw shows up. They actually look pretty at normal size IMHO.